Posts Tagged ‘ update

Dynamics 365 Finance and Operations Ortamlarında Versiyon Nasıl Güncellenir?

Bu yazıda Dynamics 365 Finance and Operations ortamlarınızın versiyonlarını nasıl güncelleyebilirsiniz anlatmaya çalışacağım. Öncelikle hakkını teslim edelim Microsoft çok iyi bir çözümle ERP sisteminin güncellemesini neredeyse Windows 10 güncellemesi gibi bir hale getirdi. Tek versiyon (One Version) yaklaşımı iş yazılımlarında bir devrim bence. Bulutta ERP kullanan bütün müşteriler belli periyotta yayınlanan güncellemeleri almak zorunda tabi burada güzel olan şey Extension yaklaşımı sayesinde Microsoft istediği gibi sistemi güncelliyor sizin geliştirmeleriniz bundan çok nadir etkileniyor. Eski sistemde bir üst güncellemeye bile geçmek aylarca süren bir proje oluyordu. Şimdi günler hatta saatler içinde halledebiliyorsunuz.

Bu yazıda CU34 olan bir demo ortamını CU35’e nasıl yükseltiriz anlatacağım.  Öncelikle projemizi seçiyoruz.

Resim-1

Read more

How to Update the Version in Dynamics 365 Finance and Operations Environments?

In this article, I will try to explain how you can update the versions of your Dynamics 365 Finance and Operations environments. First of all, we should give credit where it is due. Microsoft made the ERP system update almost like the Windows 10 update with a very good solution. I think the One Version approach is a revolution in business software. All customers using ERP in the cloud have to receive updates published periodically. The good thing here is that Microsoft updates the system at will, thanks to the Extension approach. Your developments are rarely affected by this. In the old system, it was a process that took months to even upgrade to a higher update. Now you can get it done in days or even hours.

In this article, I will explain how to upgrade a demo environment from CU34 to CU35.  First, select your project.
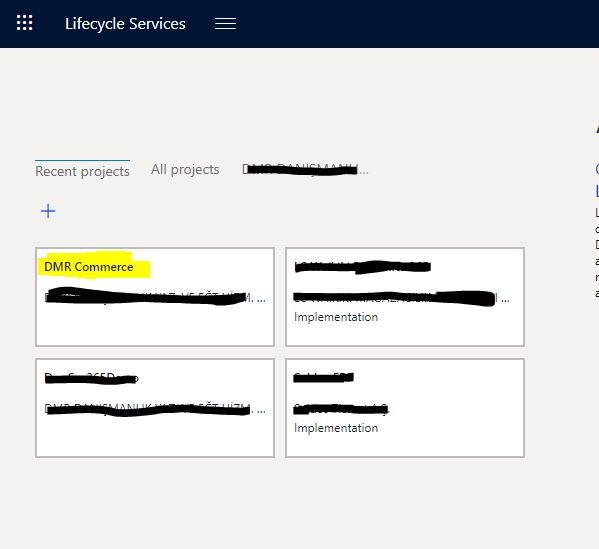
Image-1

Select the environment you want to update.
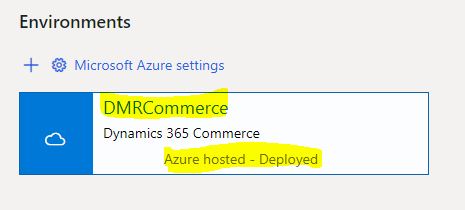
Image-2

Your environment information appears. Go down and look at the update information.
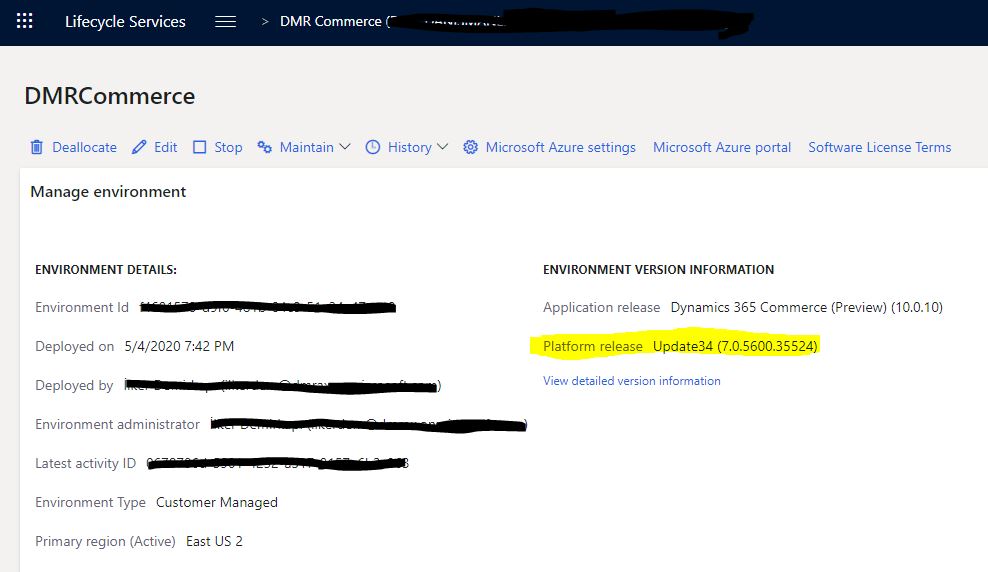
Image-3

It says that there is an update. Click View Update.
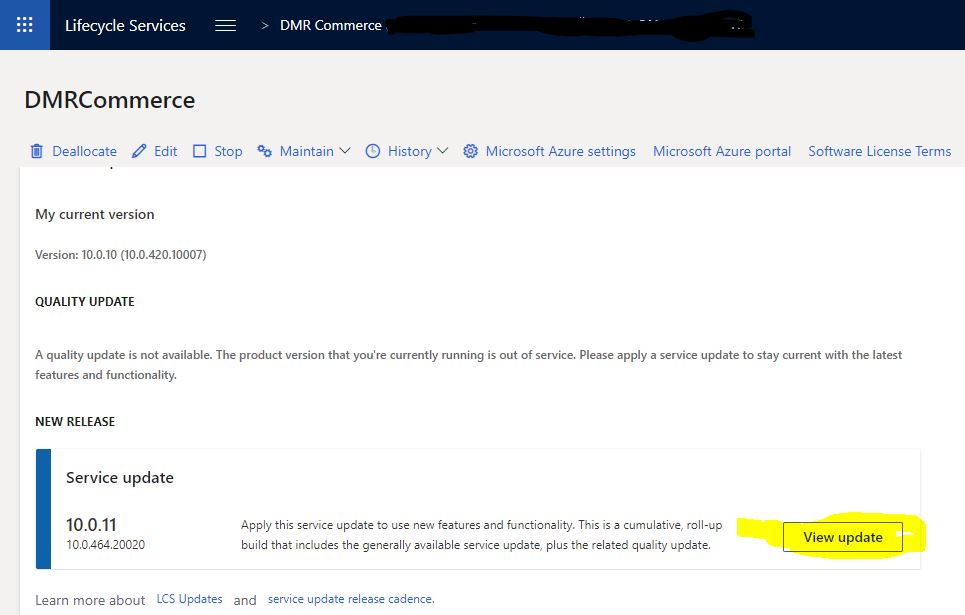
Image-4

It shows all of the update packages. Click Save package.
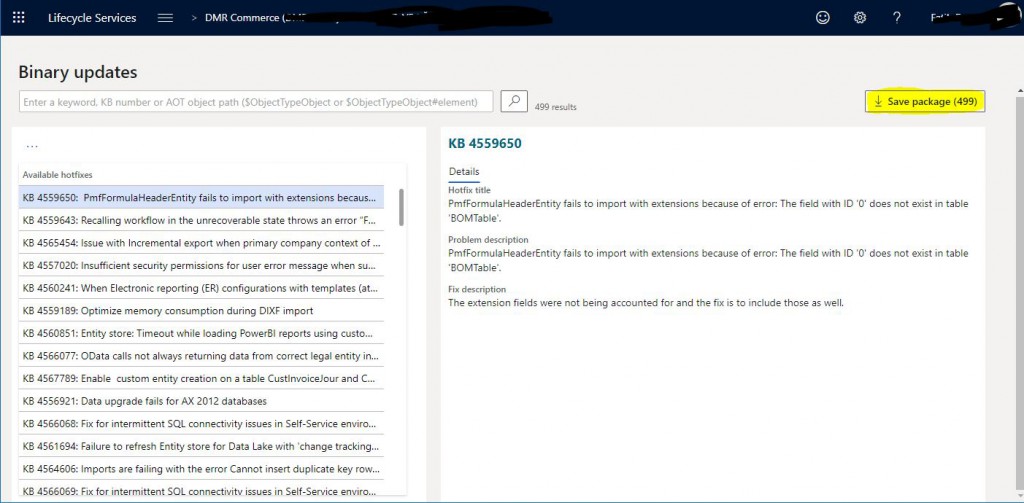
Image-5

Here I have selected all the packages. You must do this for the version update. If you need different updates, you can choose the package directly from here. Then click Save package.
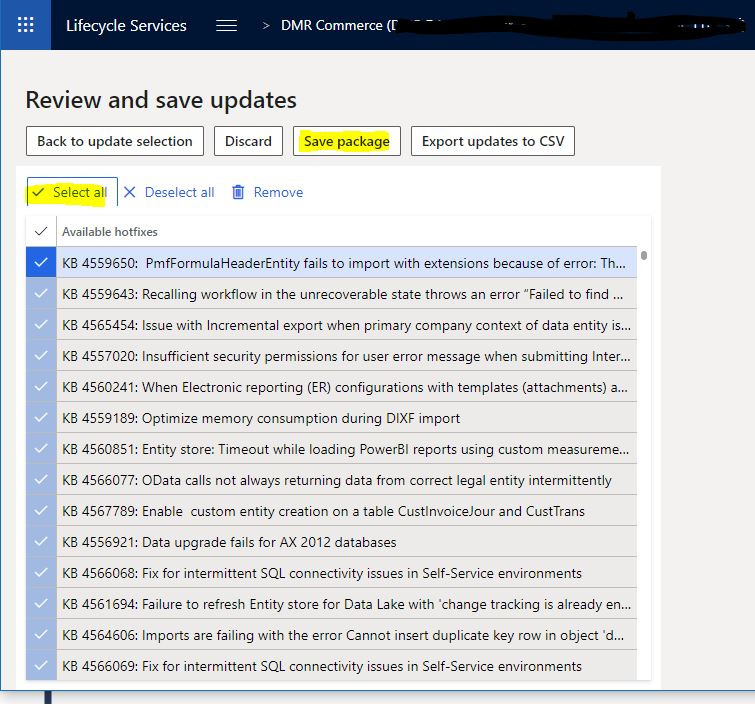
Image-6

Name the package and click Save package.
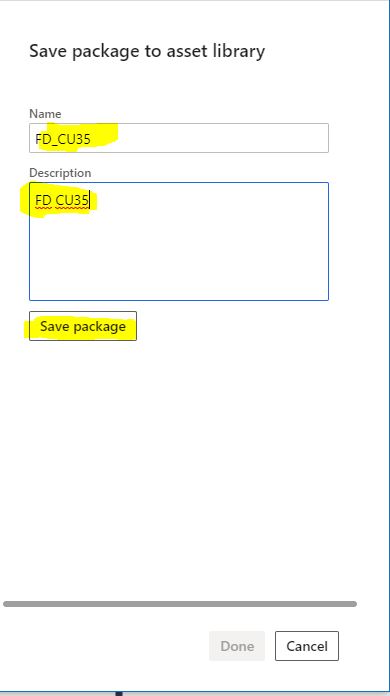
Image-7

This takes some time depending on the size of the package.
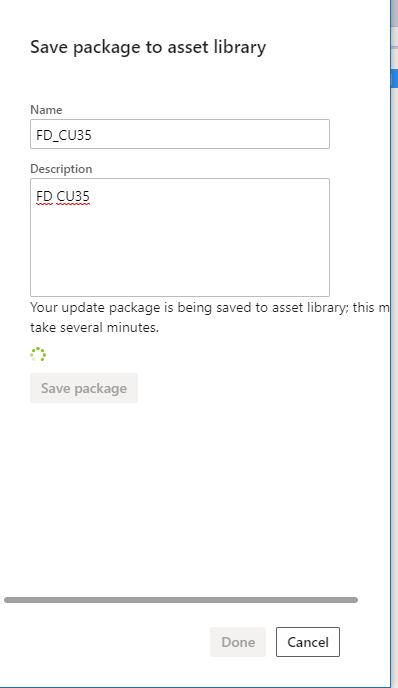
Image-8

If it completes without error, the following explanation will appear. Complete the process by clicking Done.
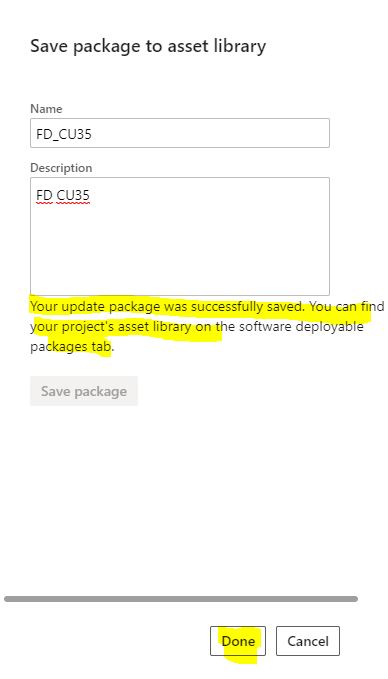
Image-9

Go to the Asset library and open the Software deployable package tab. Package has arrived but has not been approved yet. We have to wait for a while.
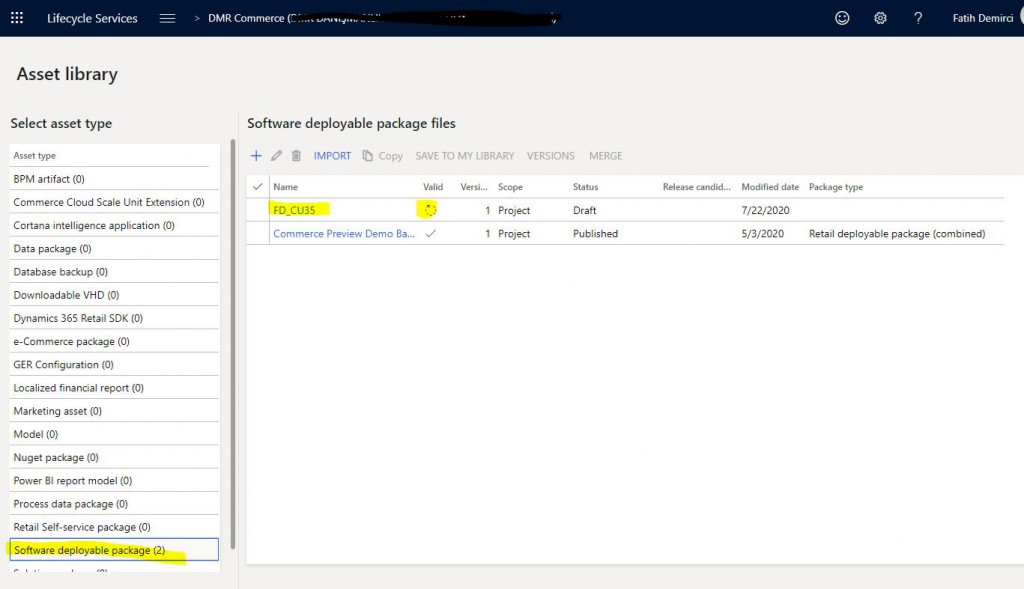
Image-10

After approval, open your environment again and click Apply updates.
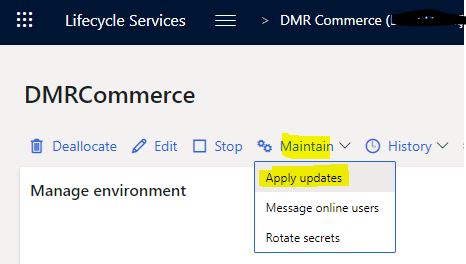
Image-11

Select your package from the page that opens and click Apply.
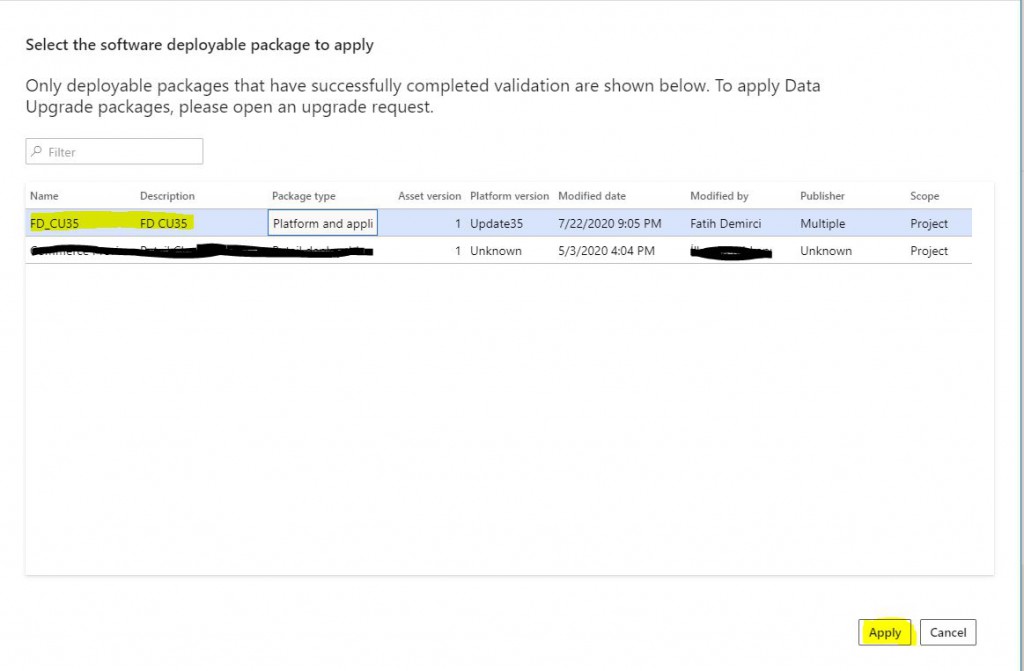
Image-12

The confirmation screen will appear. Click Yes and continue.
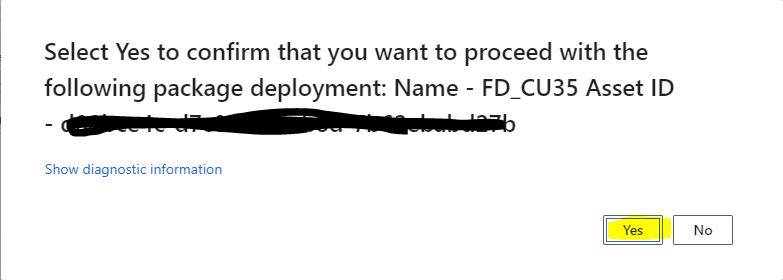
Image-13

It says our version will be updated. Click Yes.
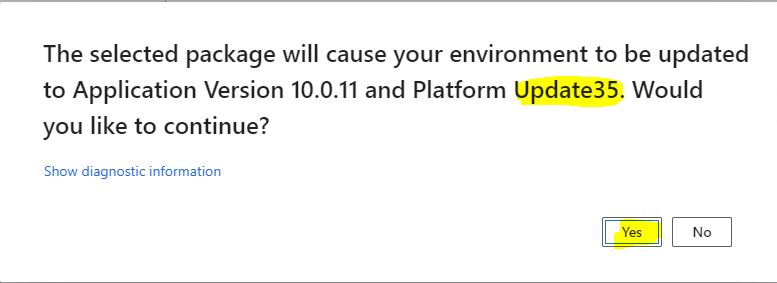
Image-14

After that, the update process starts. You can track the status of the environment here. If there is no problem within 1 hour, the process will be completed. If there is a problem, you can refer to the log to see the origination.
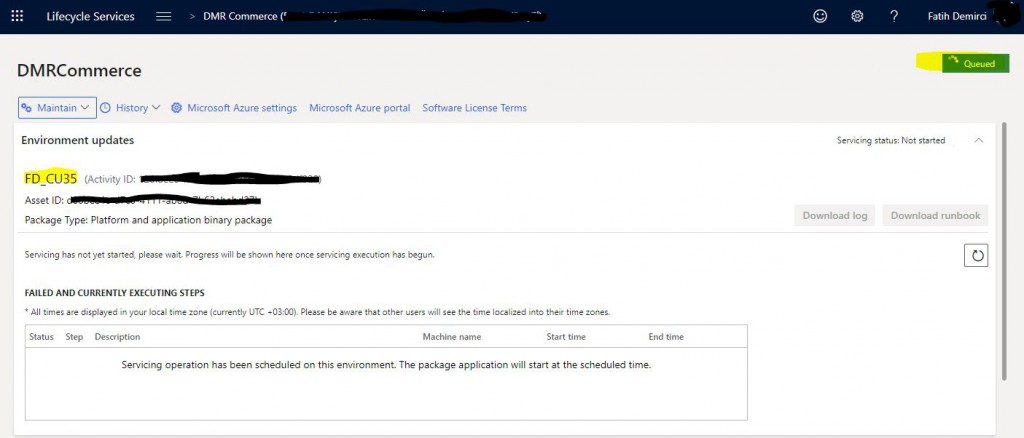
Image-15

When the update is complete, if there was a problem, there are options such as undo and retry.
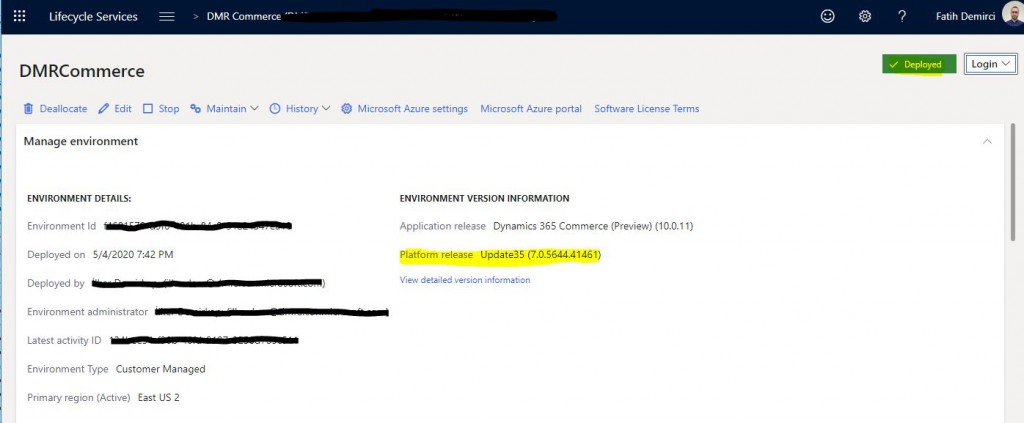
Image-16

In this article, I explained how an environment is updated to the new version. It’s a very simple process. If you need to update multiple environments, you don’t need to create packages for all of them. You can use the same package for all your environments. Make sure your environment is open before starting the update. If you turn off the machine from Azure side, LCS doesn’t see it. After the update is complete, it is useful to start a synchronization via VS for demo environments like this.

Regards.

www.fatihdemirci.net

TAGs: Microsoft Life Cycle Services, LCS, Azure, Azure DevOps, Update, Microsoft Dynamics 365, MsDyn365FO, MsDyn365CE, MsDyn365, Dynamics 365 Insights Power BI, Power Automate, Power Apps, Power Virtual Agents, what is Dynamics 365, Dynamics 365 ERP, Dynamics 365 CRM
X++ :19- Insert, Update, Delete Nasıl Kullanılır?

Bu yazıda X++ DataManupulation nasıl yapılır anlatmaya çalışacağım. Veri oluşturma güncelleme ve silme işlemleri ERP için en temel fonksiyonalardır. X++ ile nasıl yapılır bir örnek yapalım. Önceki yazılarımda kullandığım FDBookTable’ı kullanacağım.

class FDDataManupulation

{

public static void main(Args _args)

{

FDBookTable bookTable;

FDBookTable bookTableUp;

;

bookTable.clear(); // TableBuffer’ı temizliyoruz.

bookTable.BookId    = “B005″;

bookTable.BookName  = “Book 1″;

bookTable.insert(); // Yeni kayıt oluşturma

bookTable.clear();

bookTable.BookId    = “B006″;

bookTable.BookName  = “Book 2″;

if(bookTable.validateWrite()) // Kodla insert yaptığınızda validasyon çalışmaz bu yüzden koda eklemek gerekiyor.

{

bookTable.insert();

}

// Güncelleme yapalım. Öncelikle güncellemek istediğimiz kaydı seçmeliyiz ve Transaction bloğu oluşturmalıyız. Bunun sebebi eğer güncelleme sırasında bir hata olursa geri alma yapabilmektir.

ttsbegin;

select forupdate bookTableUp

where bookTableUp.BookId == “B006″;

bookTableUp.BookName = “Book 3″;

bookTableUp.update(); // Tek bir satır günceller

ttscommit;

ttsbegin;

while select forupdate bookTableUp

where bookTableUp.BookId == “B006″

{

bookTableUp.updare(); // Yine tek bir satır günceller ama eğer sorgudan daha çok kayıt gelseydi mesela kapak tipine göre filtre verseydim gelen tüm kayıtları güncellerdi.

}

ttscommit;

// Kayıt silme

delete_from

where bookTableUp.BookId == “B006″; En temel kullanımı budur ama Delete metoduyla da silebilirsiniz.

while select forupdate bookTableUp

where bookTableUp.BookId == “B006″

{

bookTableUp.delete(); // Kaydı siler

}

}

}

Bu yazıda temel Insert Update Delete nasıl yapılır anlatmaya çalıştım. Performans açısından bunları doğru yapmak çok önemli. Birde bunları Bulk halinde yapabilmeniz mümkün onları da ayrıca anlatacağım.

Selamlar.

www.fatihdemirci.net

TAGs: X++,Insert,Update,Delete, Azure, Azure DevOps, Microsoft Dynamics 365, MsDyn365FO, MsDyn365CE, MsDyn365

X++ :13- Update Metodu Ne İşe Yarar?

Bu yazıda Dynamics 365 Finance and Operations tablo metotlarından Update() metodunu anlatacağım. Önceki yazılarımda tabloların temel yapılarından bahsetmiştim. Şimdi ayrıntılı olarak alt seviye nesne ve metotları inceleyeceğim. Tablolar XRecord sınıfından türetilen aslında SQL tabloların sınıf karşılıklarıdır. Sınıflardan temel bir iki farkı vardır. Sınıf olmasına rağmen New ile nesne oluşturmak gerekmez. Alanlar metot gibi davranın ama paranteze ihtiyaç duymaz. Update() metodu tabloda bir kayıt güncellenirken çalışan metottur.

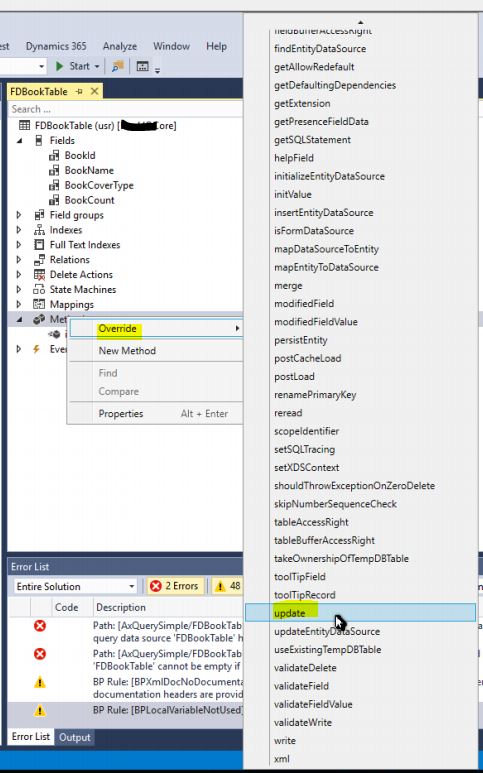
FDBookTable tablosunda Metotlara sağ tıklayıp Update() metodunu Override ettim.

Resim-1

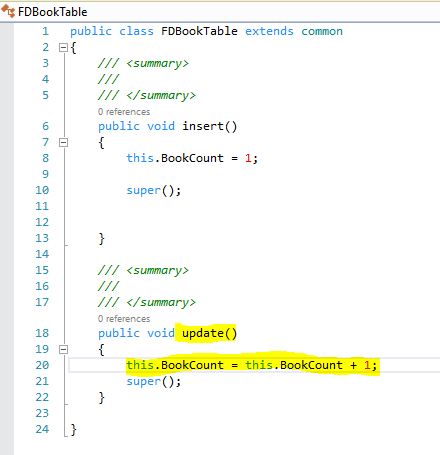
Super()’i daha önce anlatmıştım. Aslı işi yapan yanı DB’deki veriyi güncelleyen ana sınıftaki kodu çağırır. Basit bir kod yazdım her seferinde sayıyı bir arttıracak şekilde.

Resim-2

Tablo tarayıcısını açıp herhangi bir güncelleme yaptığımda sayının arttığını gördüm.

Resim-3

void update(boolean _updateSmmBusRelTable = true, boolean _updateParty = true)

{

CustTable   this_Orig = this.orig();

RecVersion  rv = this_Orig.RecVersion;

ttsbegin;

super();

// Update the full text search table

MCRFullTextSearch::update(this);

this.SysExtensionSerializerMap::postUpdate();

if (_updateSmmBusRelTable)

{

smmBusRelTable::updateFromCustTableSFA2(this, ”, false);

}

if (this_Orig.CustGroup != this.CustGroup)

{

ForecastSales::setCustGroupId(this.AccountNum,

this_Orig.CustGroup,

this.CustGroup);

}

smmTransLog::initTrans(this, smmLogAction::update);

// If the customer group has changed

if (this.CustGroup != this_Orig.CustGroup)

{

// clear the ledger cache

LedgerCache::clearScope(LedgerCacheScope::PartyMainAccountDimensionListProvCust);

}

if (SysCountryRegionCode::isLegalEntityInCountryRegion([#isoMX]) && _updateParty)

{

this.copyInfoToParty();

}

ttscommit;

}

CustTable Update() metodunu inceleyelim. Güncelleme olduktan sonra eğer belli bir alanın güncellenip güncellenmediğini kontrol etmek istiyorsanız this.Orig() ile kaydın orijinal halini alıp kıyaslayabilirsiniz.

CustTable   this_Orig = this.orig();

if (this.CustGroup != this_Orig.CustGroup)

Bu iki satır kullanıma güzel bir örnek.

Selamlar.

www.fatihdemirci.net

TAGs: X++,Update, Azure, Azure DevOps, Microsoft Dynamics 365, MsDyn365FO, MsDyn365CE, MsDyn365