How to Move Developments to Dynamics 365 Finance and Operations Test and Live Environments? 3- Build
How to Move Developments to Dynamics 365 Finance and Operations Test and Live Environments? 3- Build
In this article, I will talk about how to perform the Build operation required to move the developments we made from Visual Studio for Dynamics 365 Finance and Operations to Test and Live environments. Build needs to be performed on a certain Branch. When Build is complete, if there is no error, it will generate a Deployable Package for us. We need this package for code migration.
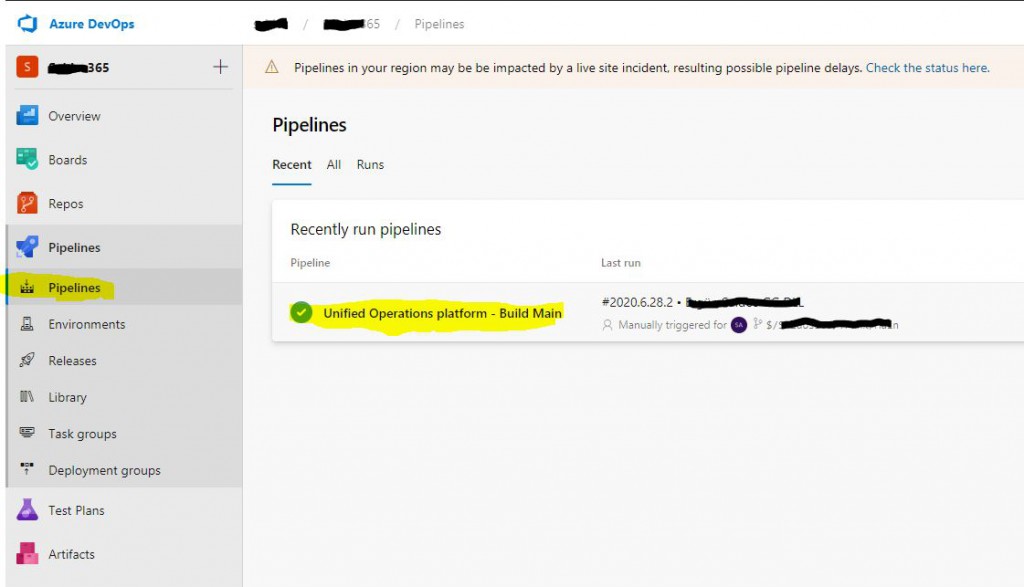
You have to perform Build through Azure DevOps, not from Visual Studio. After logging in as a user with admin rights, open the Pipelines tab. Unified Operations platform – Build Main will be created automatically when you set Azure DevOps settings via LCS. We will take this as basis. Since our environment is only Main Branch, I continue without making any changes in the basic settings. First let’s see how we can run it, then we will examine the other settings.
Image-1
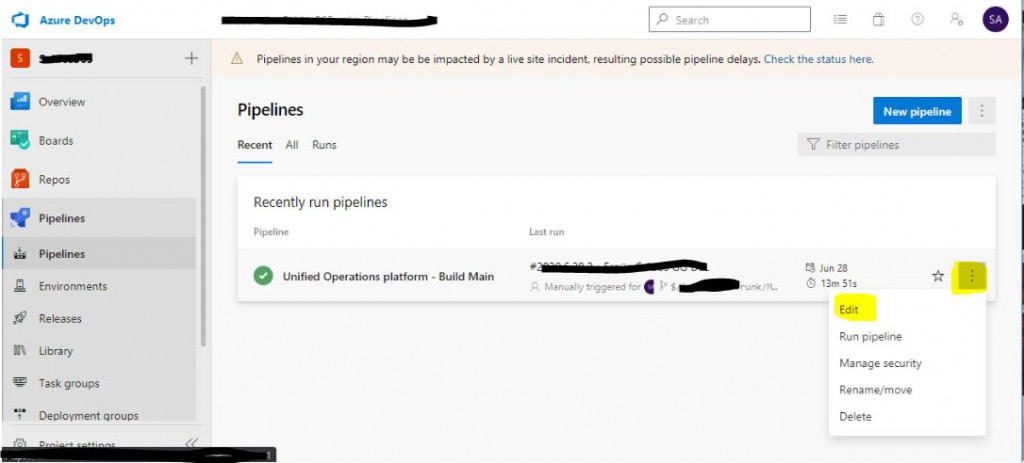
Click the Edit button from the ellipsis menu.
Image-2
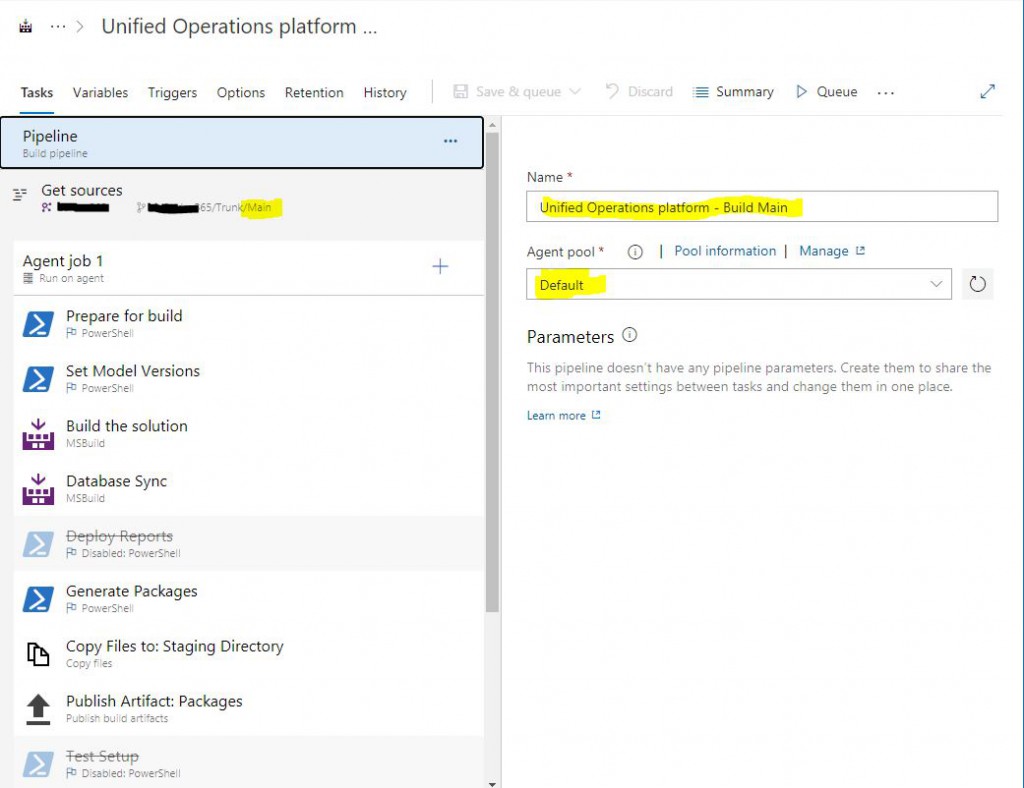
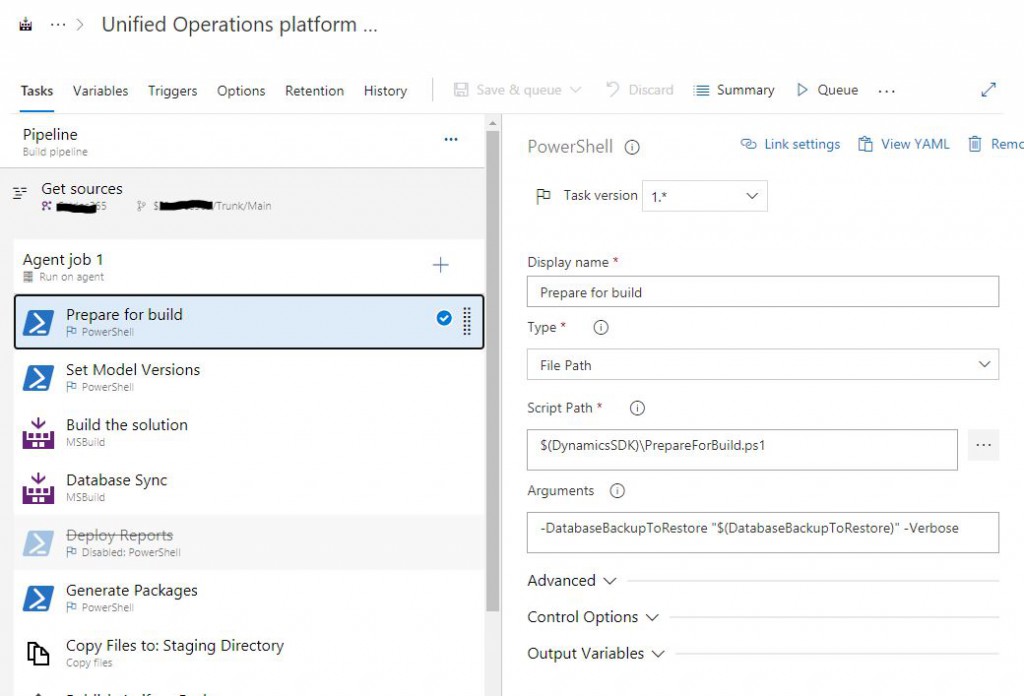
Build steps are listed.
Image-3
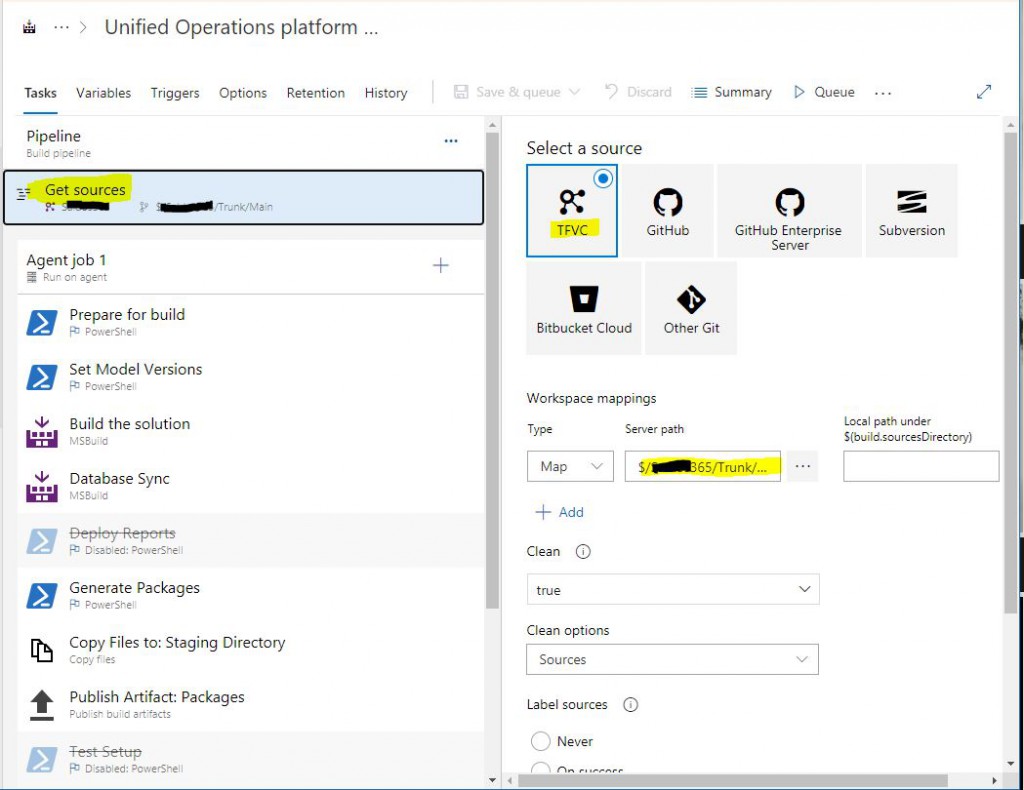
If you want to build a different Branch, you need to change the Server path. We are making a change here.
Image-4
You can right click and Disable steps that are not required at this time. I disabled the Deploy Reports step because I do not have a report development.
Image-5
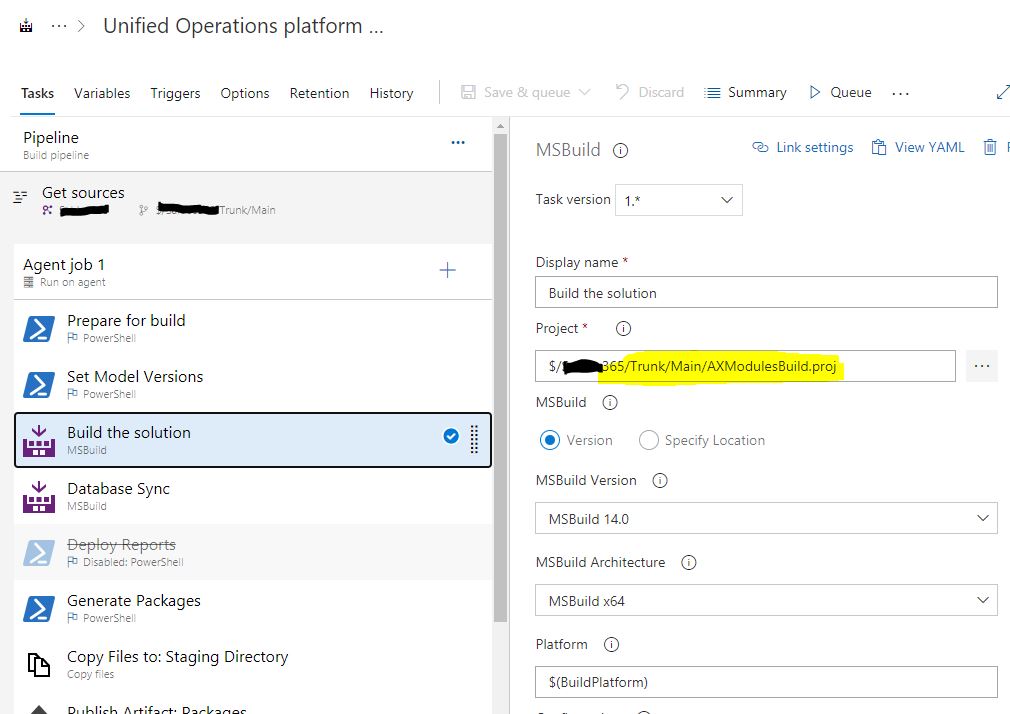
The main step is Build the solution. Our Branch path is here again. If you want to build a different Branch, you should change this as well.
Image-6
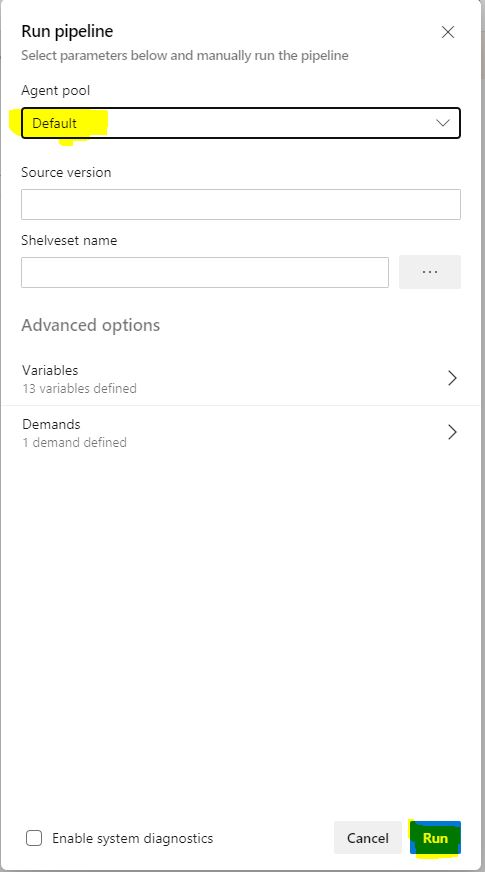
Click Queue. Whn you click Run in the popup window, Build operation starts.
Image-7
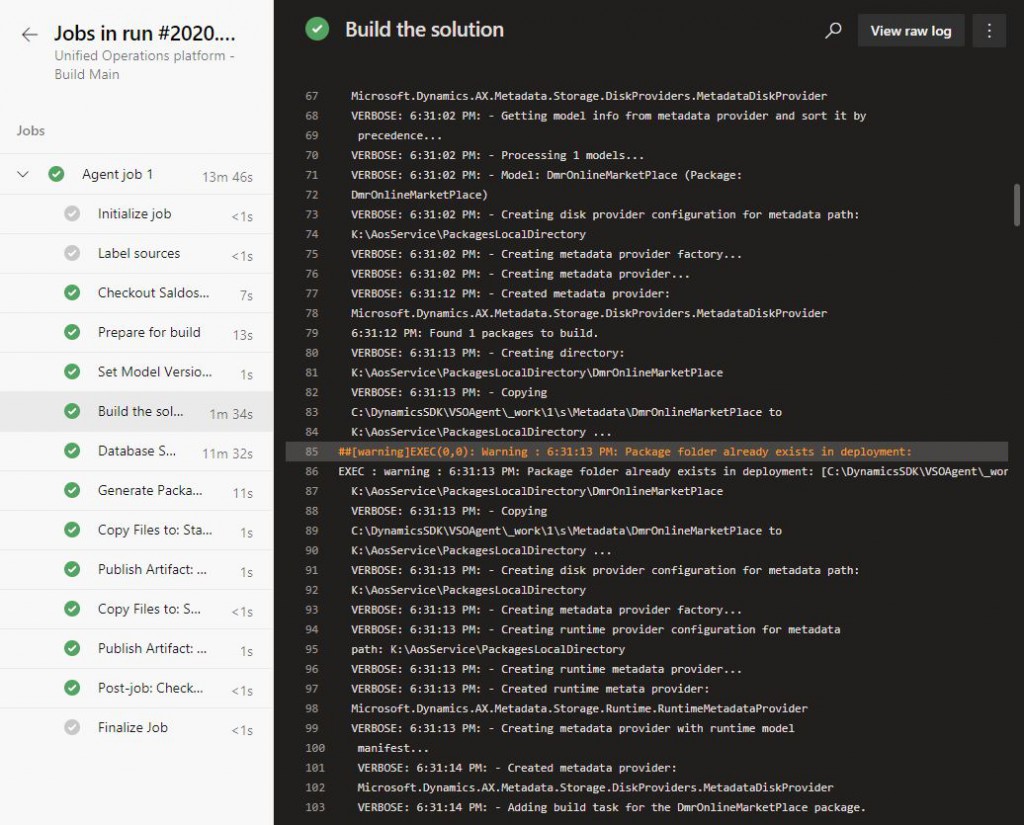
You can follow the Build steps.
Image-8
If it completes with no errors, it will look like the following. If it gives errors, it is necessary to examine the logs and errors. Generally there are not very complex problems. There are cases such as missing reference, incorrect Check-in, but there may be situations that need to be further examined. You can open it by clicking on the record.
Image-9
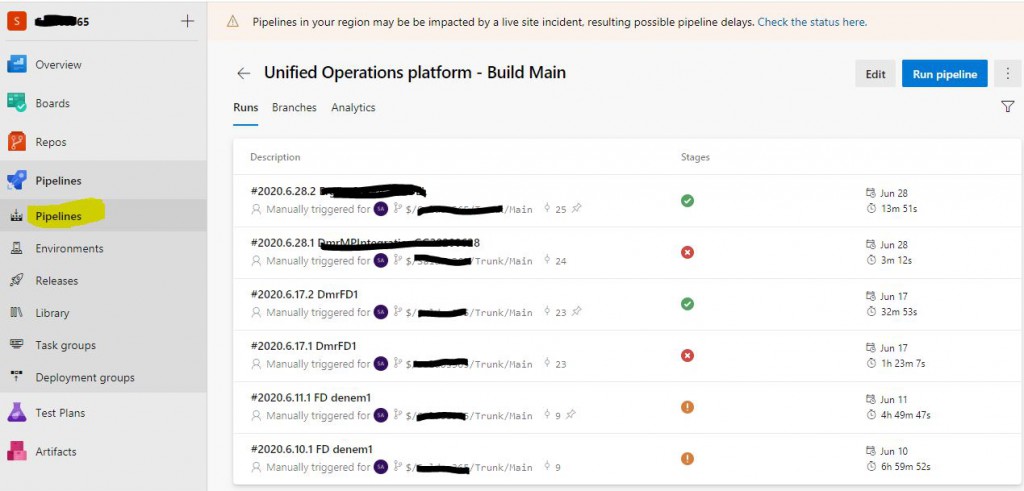
When you enter, all your previous Builds will be listed. You can view their status and information. The first record is our last Build, completed without error. Click to open it.
Image-10
You can see details about the Build here. Click and open the relevant part (3 published).
Image-11
Under Packages, Deployable Package starting with AxDeployableRuntime is created. We need to download it from here and upload it to the LCS. I will explain this in my next article. At this stage, the Build operation is done. Now let’s look at how you can create a new Pipeline.
Image-12
Main Pipelines are created by default. If you want to create them in other Branches, you either make all the definitions manually, which is very demanding, or you can use the Clone or Export features. For both cases, do not forget to change the path settings for the new Pipeline.
Image-13
You can Import the Exported file from the following path again. Generally code is transferred to live environment from Main or Release Branch, and to test environment from Dev Branch. Of course, these are approaches that vary depending on the project and the team.
Image-14
In this article, I tried to explain how Build is triggered through Azure DevOps. A machine is required for Build right now, but we will soon be able to do this thanks to an agent. It will be a faster and inexpensive solution. By completing this stage, we have reached the final stage in code migration. In my next article, I will explain how we deploy code over LCS.
Regards.
www.fatihdemirci.net
Microsoft Life Cycle Services, LCS, Azure, Azure DevOps, Build, Microsoft Dynamics 365, MsDyn365FO, MsDyn365CE, MsDyn365, Dynamics 365 Insights Power BI, Power Automate, Power Apps, Power Virtual Agents, what is Dynamics 365, Dynamics 365 ERP, Dynamics 365 CRM
