How to deploy a new Build environment for Dynamics 365 Finance and Operations?
In this article, I will try to explain step by step how to deploy a new Build type virtual machine for Dynamics 365 Finance and Operations.
Before you start, if you have a customer adaptation project, it is recommended to set the SandBox Develop And Test environment that appears here as Build. Because the admin login authorization to this environment will soon be removed and it will not be possible to use it for development. Therefore, it is useful to set it as Build. In addition, thanks to an Agent that will be released soon, we will be able to Build without allocating an entire VM.
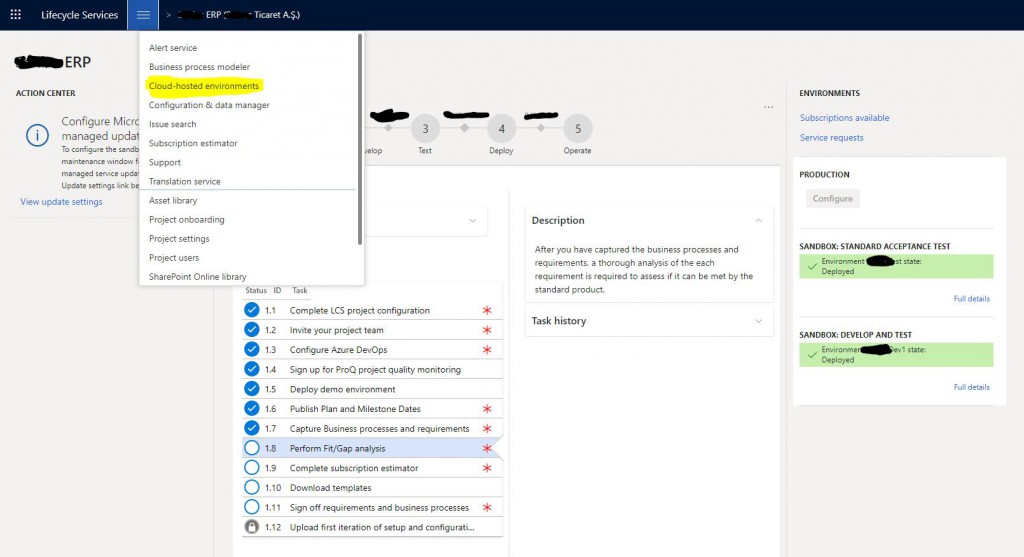
In this example, you will see how to create a new Build machine via Cloud-hosted environment. It has the same steps as Sandbox, so it will be a post that will cover both. First, we log in to Lifecycle Services. Select your project and select Cloud-hosted environments from the hamburger menu.
Image-1
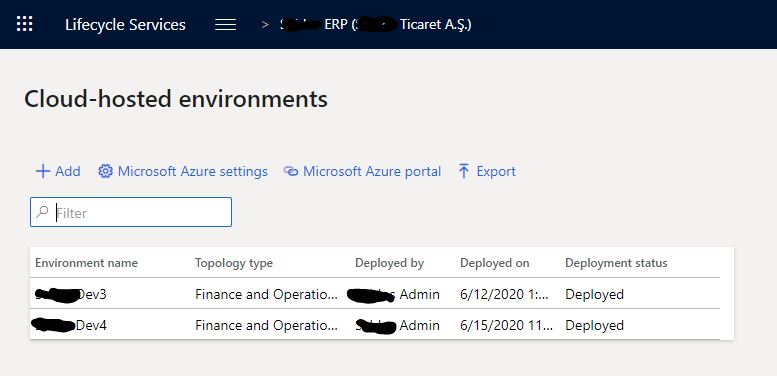
A page will open and list your environments. Here you can view the details and manage their status. For a new Build environment, click the + Add button.
Image-2
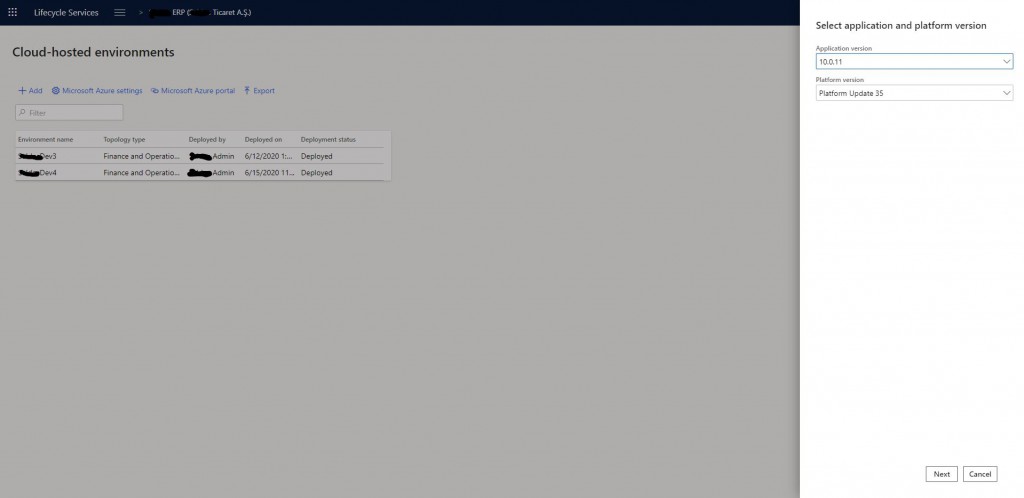
The first screen that opens has Application Version and Platform Version. You usually select the most recent one. Of course, you should select the version of your environment here. Click Next to proceed.
Image-3
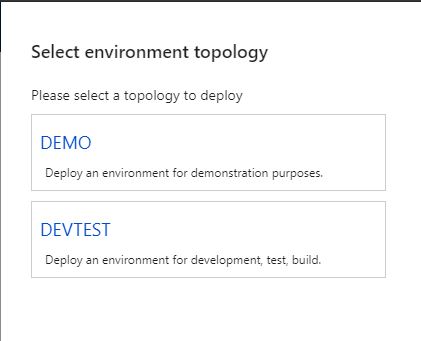
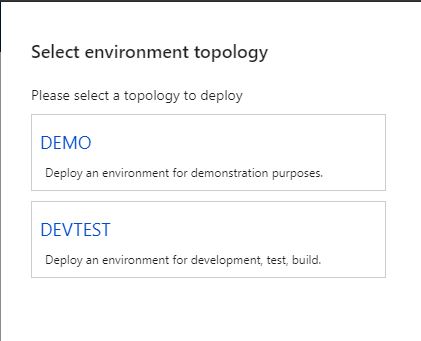
Here you select the type of the environment. Available options are Demo and DevTest. For Build, you should choose DevTest.
Image-4
There are two options here. First one is used for Build or Test. For development, you should select Develop. We will choose the one above.
Image-5
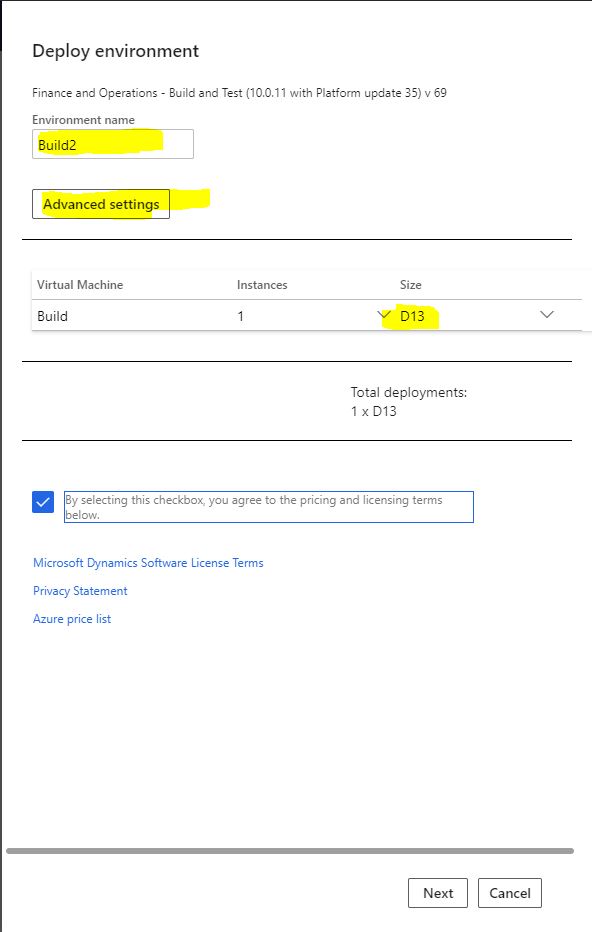
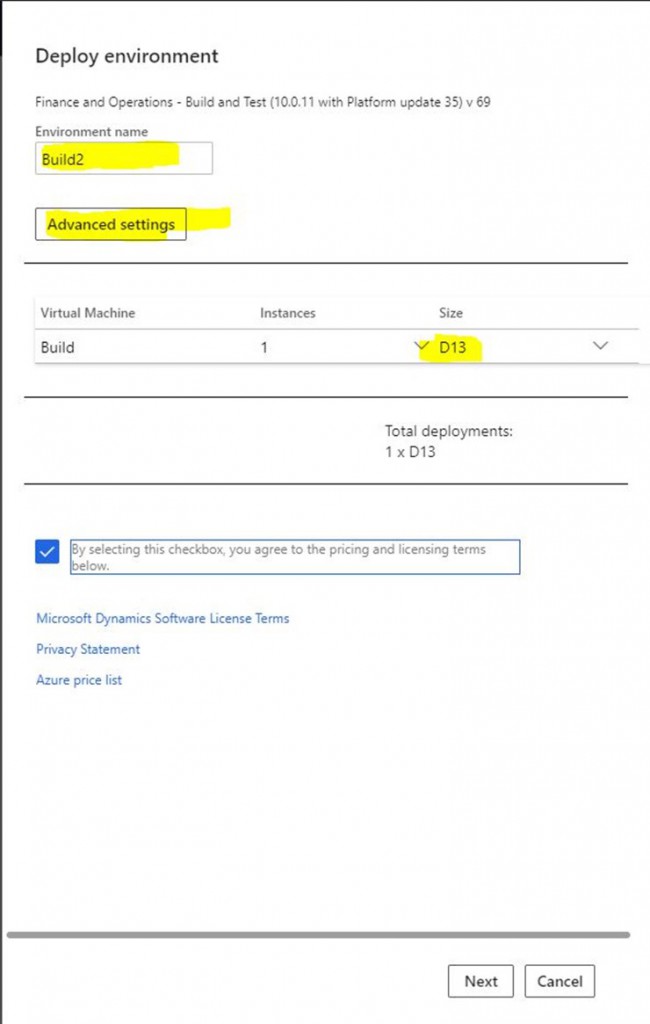
Here you can adjust the environment settings. First give a name. This name is not virtual machine’s name. We will set it from the advanced settings. The most important option is D12 or DS12 V2 machines that are recommended For you, but if you want it to be a little faster and money is not an issue, choose D13. You can view the advanced settings by clicking Advanced Settings.
Image-6
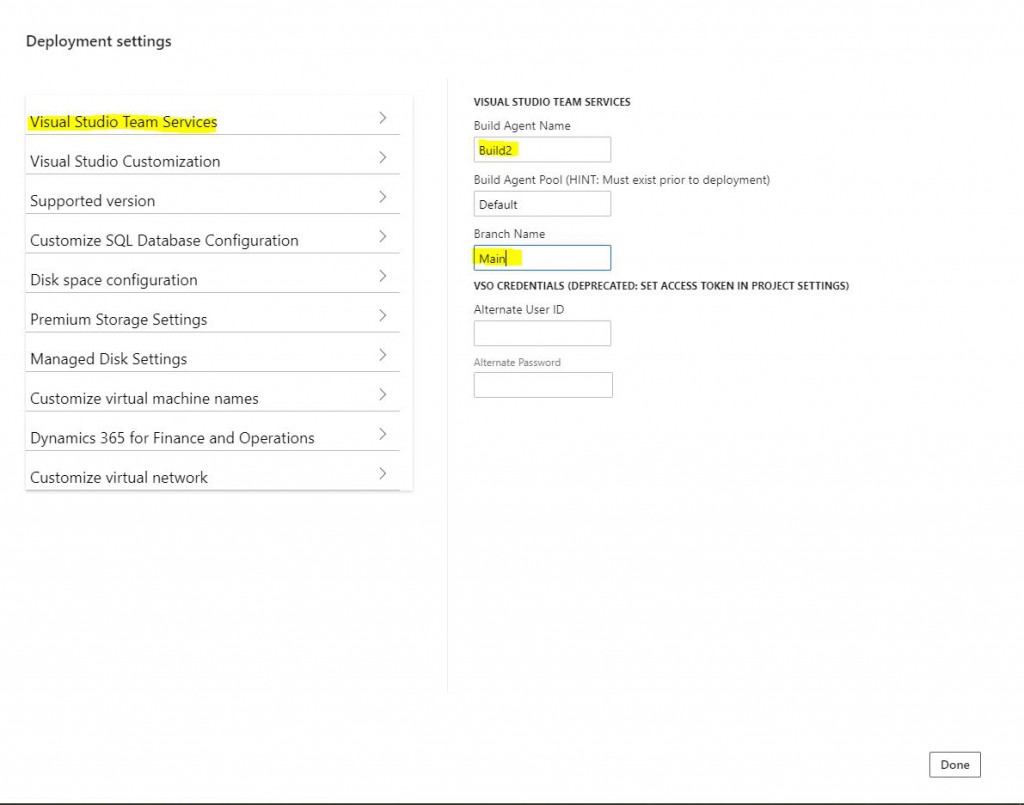
You can make advanced settings from the screen that opens. You don’t need to change many settings. I will talk about the important ones. Build Agent Name is the name you will see in Azure DevOps. You should give it an appropriate name. The most important part is the Branch Name. I typed Main here. It is case sensitive, so it is necessary to type Branch name correctly.
Image-7
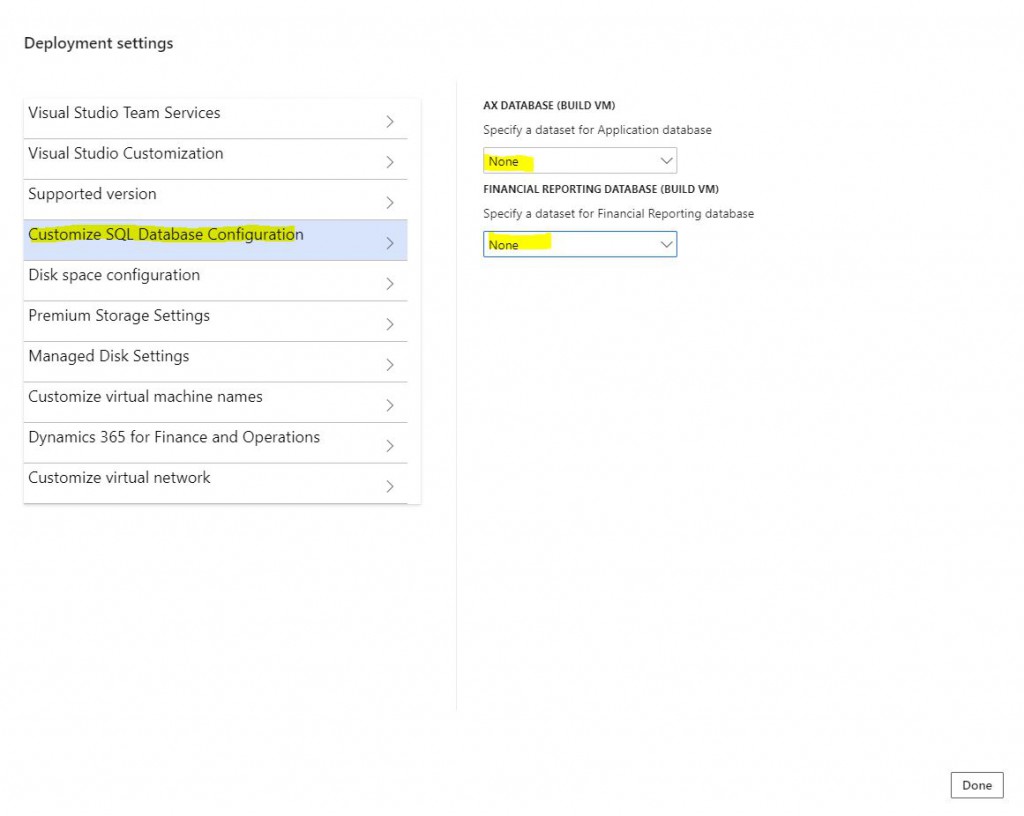
There is no need for Demo data for the Build environment, you can remove it from here.
Image-8
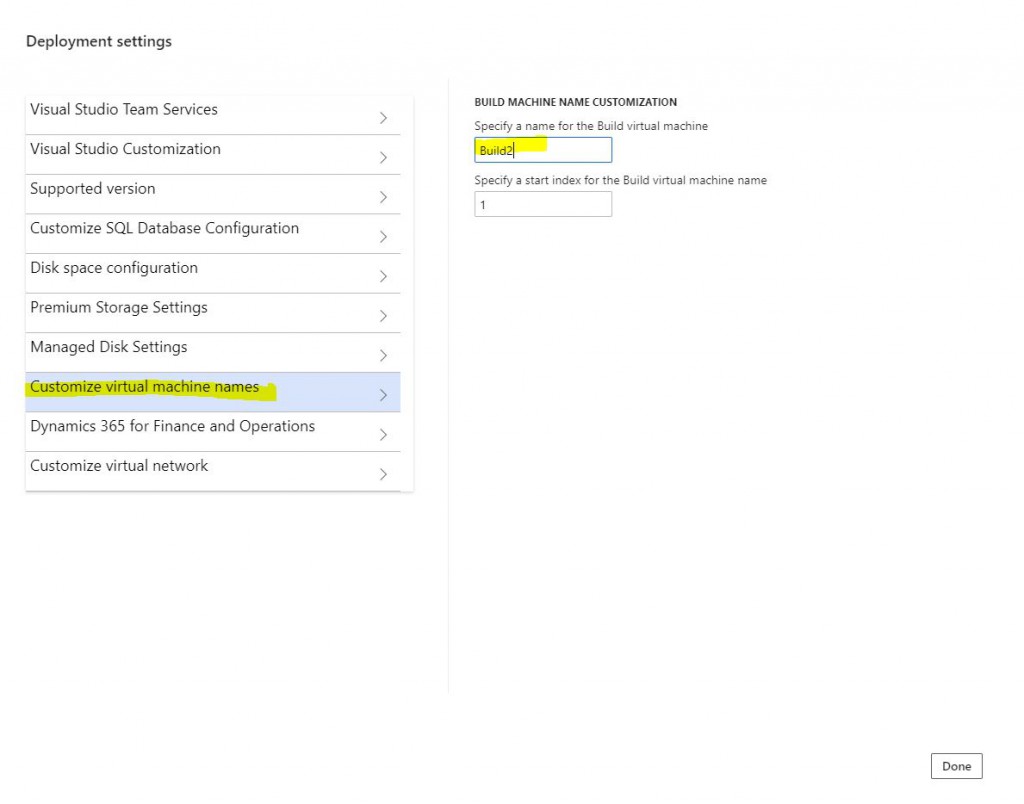
You can name your virtual machine in this section.
Image-9
Settings are done. Continue with Next. I selected D12 V2 for the For you. However the picture shows D13. Recommended dimension is D12 and its derivatives.
Image-10
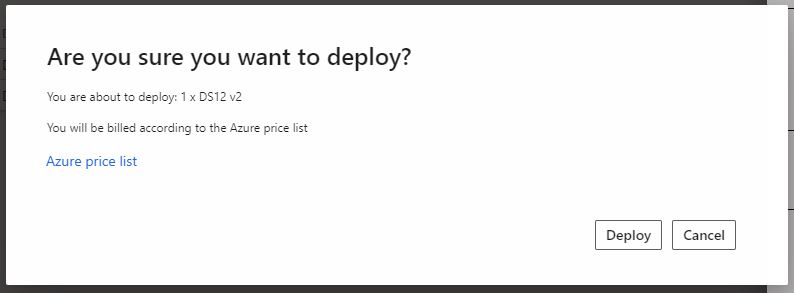
The confirmation screen will appear. When you click Deploy, the Build environment will be queued to be deployed. This process is completed in 3-6 hours.
Image-11
In this article, I tried to briefly explain how to deploy a new Build machine and I will explain how to Build in my next articles. I will try to explain how the resulting packages are transferred to the test and live. I hope it is useful for you.
Regards.
www.fatihdemirci.net
TAGs: Build VM, Lifecycle Services, LCS, Azure DevOps, X++, Microsoft Dynamics 365, MsDyn365FO, MsDyn365CE, MsDyn365, Dynamics 365 Insights Power BI, Power Automate, Power Apss, Power Virtual Agents, what is Dynamics 365, Dynamics 365 ERP, Dynamics 365 CRM
